The Ninth Checker
Dan Rovira
You’ve seen this position before. For money, it’s a standard 55 blitz reference position which is a small double (-0.024) and a big take (+0.384). That tells us that with a tiny match lead, it would be a No-Double.
Let’s look at a variation to the position. Below with a spare checker on the eight-point, it becomes a big double (-0.224) and a smaller take than before but still a blunder to pass (+0.080).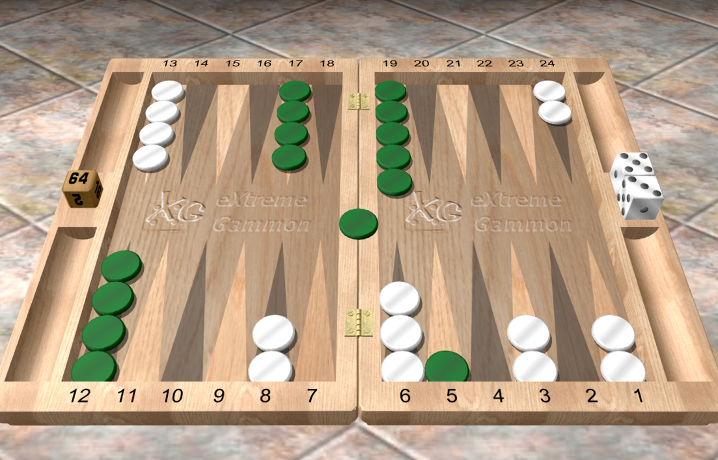
Having the eight-point means you have a ninth checker in the zone and you have increased your blitz value, but also you can’t be indirectly hit back and it blocks the open two-point. 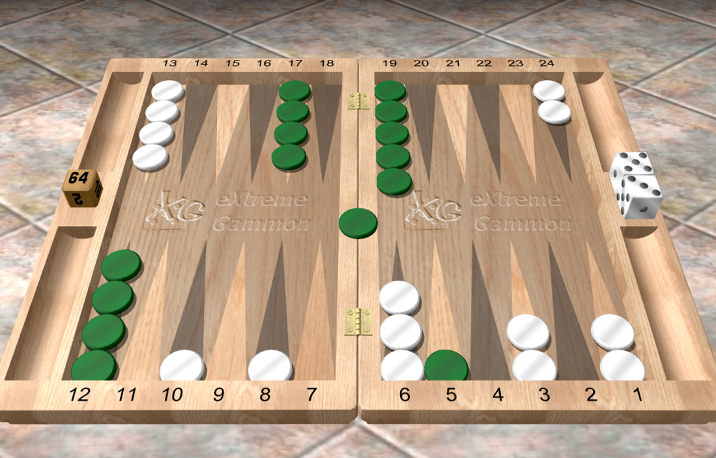
In this position, white still has nine checkers in the zone, but now has diversified his numbers to hit and make points with. This position is now a Double-Pass (+0.065) which would be the case also if we moved the checker on the ten-point to the nine- or seven-point. With the checker on the eleven-point instead, it would be a small take due to the fact that the checker doesn’t connect with as many inner-board points (i.e. it isn’t 6 or fewer pips away).What can we learn from these positions? Firstly, the ninth checker is important, and where it is in the outfield is more important. These references are a guide to finding the right cube action in similar positions. For example, in the below position, we know it must be a big Pass.
And in this position below?
This is a Double-Take. But can you explain why? White has nine in the zone and diversified the checkers which is a sign to double, but because the checker on the eleven-point lacks good coverage of the home board it becomes a take. Move the checker to the nine-point and it’s a borderline take/pass.What about this one below?
Now, I’ve moved the white checker from the eleven- to the ten-point, and also sprung another green checker loose in the outfield. Adjusting your knowledge from the references, you should be able to work out that this is a Double (-0.282) and a Pass (+0.061).My advice is: Better to spend ten minutes on one position, than one minute on ten positions. This is the way to learn: shifting the variables of a position until you can see which are the key features. Then when faced with something similar over the board, you’ll have a visual map of what to look out for, which will more often than not lead you to the right decision. Dan Rovira has the UK’s leading YouTube backgammon learning channel at @BackgammonIsBeautiful