Post Crawford Trick
What's up, backgammon nerds? In this blog post, we're going to talk about the post-Crawford trick.
Sometimes when you see grandmasters play, you might be wondering: Why doesn't he just double? It's an automatic double, what's going on? What is he waiting for? Is he forgetting to cube?
And actually, what is going on in that scenario is that the player who's trailing in the match in the post-Crawford game might trick you into getting a tough decision later on rather than just giving you an automatic cube in the early game where you have an easy decision, whether to have a free take or a free drop. In this case, for instance, if you are three away or one away, you would have a free take because even if I'm two away or one away, it's still one game post-Crawford because we're gonna double.
So, you have a free take if you just win the game 1% of the time and don't lose any gammon. But it could get complicated when you add gammons to the mix because the leader would not want to lose a gammon that might make him lose the entire match.
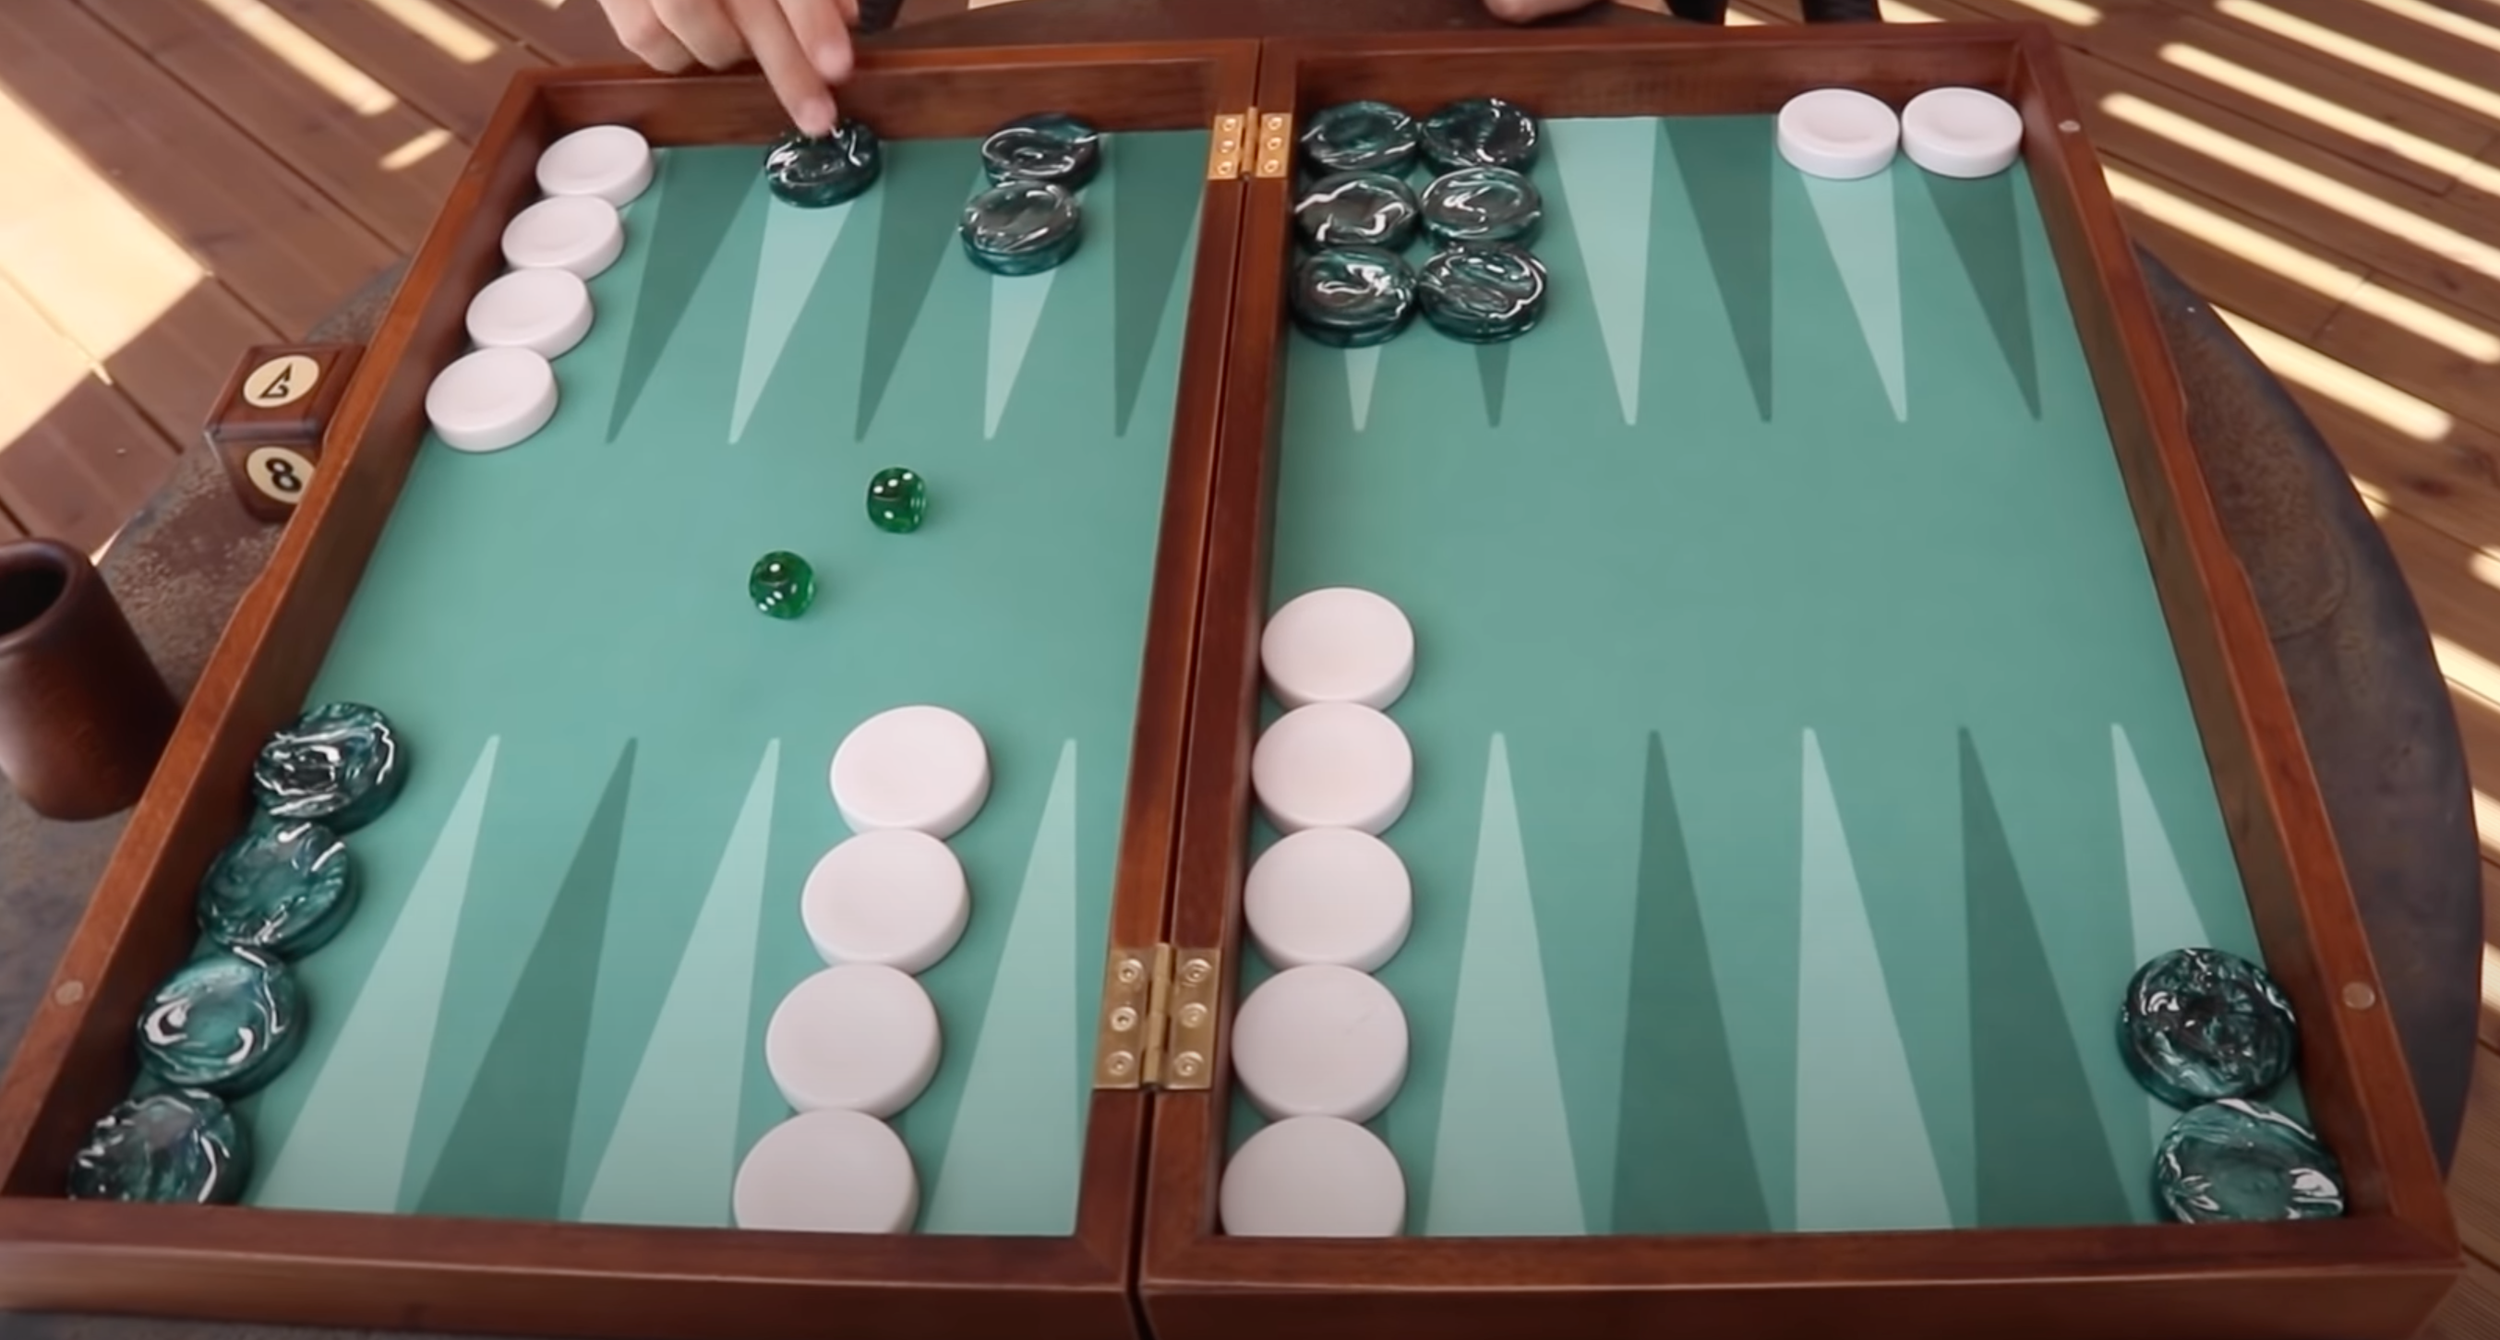
We will look at an example sequence from one of my own games where I applied this trick. I gave my opponent such a tough decision that it made him blunder! In the example position, I am three away and you are one away, post-Crawford, which means that I could just automatically double. But since you, my opponent, have a free take, I decide to wait a bit and try to give you a tough decision. The risk of waiting to double is that you might lose your market, and then you might immediately regret not doubling, which is a horrible thing to happen. You don't want to lose your market. If there is enough volatility, make sure that you double. However, if it's slightly less low on volatility,you could try to wait a little bit, try to get into a stronger position in order to give your opponent a tough decision.
Now, let's play out this game: I opened up with a 3-1 here, my best opening role. And then you rolled a 5-1, which is kind of a poor role.

According to Extreme Gammon, this is an automatic double from my part, and a huge take for your part because it would be too much to just give up this whole game and allow me to get one single win away from winning the match. Therefore, it is definitely more preferable for you to take it. If you lose, I will still be one single win away from winning the match. So, the only thing that can happen from your perspective is that you take it and then lose a gammon.
Rather than just doubling here, I decided to just take a roll to see if I could get into a slightly stronger position and give you a tough decision, and I rolled another 3-1. I played the checker down from the midpoint just to add more ammunition and increase my blitz value, thereby adding to the blitz attack here:
This is the best play, because when the cube eventually comes into play, all of my gammons will win the match.
You rolled a 5-2, which is again not a good roll. The best play is to run out all the way to the 16 point.

Now, my position got a bit stronger. But again, I decide not to cube. I will wait to see if I can get into a little bit stronger position and give you a tough decision. This is a little bit more risky now because there might be some market losers. If I rolled a double four, I would move with my checker on the midpoint, then you would have two on the bar, and I would lose my market. So, now I took a slightly bigger mistake than before.
Later, I rolled a 4-1. The best play here with the 4-1 is to hit with a four and then just build a nine point here:

You rolled a 4-5, again, a pretty bad roll. You have to play the five down here:

Now he's stacked and vulnerable. And, of course, now I can’t wait any longer because I have market losers. All of a sudden, I can win gammon and win the entire match. So, I must cube since it's too volatile. I cube, and make it a difficult decision for you. Although you have a free take, if you lose a gammon, you are going to lose the entire match. Almost all the chances make it a tough decision for you. If you drop instead of taking the risk of losing a gammon, you will end up having a blunder. So, this is still a take because you still win enough games here and the gammon threat is not that powerful just yet. In the actual game I played, I got my opponent to commit a blunder because he was too scared of the gammon. So that's pretty cool.
Let’s also look at some other scenarios here because what if I hadn't rolled the 4-1? Let's say that I had rolled the double four, which was my most powerful role here. So, the best play in this scenario would be to hit and then blitz attack on the ace point, make the double hit:

Depending on what my opponent rolls now, it's going to be a drop most of the time. If he fails to enter, it's a huge drop. If he comes in with one of them, it's again a huge drop, but he still might be fooled into taking because this is a truly tough decision at post-Crawford for the leader! So, again, I would be giving my opponent a chance to commit a huge blunder. Even if he comes in with both checkers:

According to XG, this is also a drop, though a small one.
So that was the post-Crawford trick. I hope you enjoyed reading this blog post, and now you know what's going on when you see an expert player or grandmaster waiting to double an automatic double in the post-Crawford games.
You can see the full video here!